

Filter recipients
Filters leave people out of the recipients you chose in the To field. You set them in the newsletter wizard’s Recipients step, under Filters. Every new newsletter starts with one filter, Remove duplicates, so someone who is in two of your groups gets the newsletter once.
Use a filter when the whole newsletter is for some of your recipients only, such as one office. When only one part is, show that part to some recipients only (Show a section to some recipients only).
Add a filter
Section titled “Add a filter”In the newsletter wizard, go to the Recipients step and, under Filters, select Add. The Filters dialog opens.
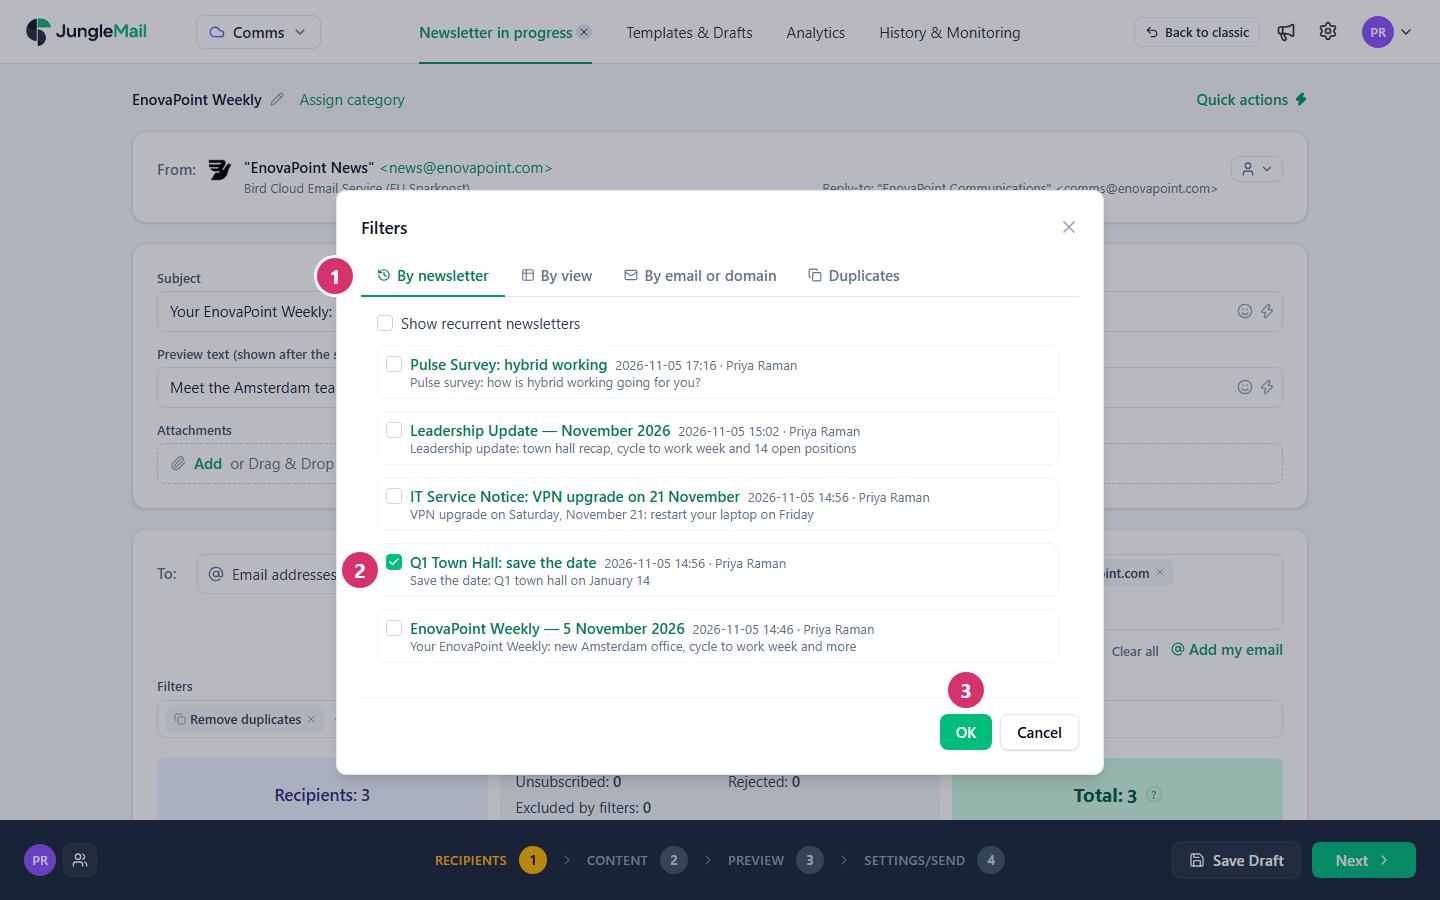
- Select the kind of filter, at the top of the dialog. The kinds are described below.
- Set the filter up. In the example, the newsletter leaves out everyone who received Q1 Town Hall: save the date.
- Select OK.
The filter is listed under Filters, and Excluded by filters, in the counts below, shows how many people it leaves out. Total is everyone who will receive the newsletter. To change a filter, select it; to remove it, select the × beside it.
If your organization allows only some email domains or forbids some, Allowed domains only or Forbidden domains is listed under Filters too. Select it to see the patterns; a newsletter can’t remove it (Restrict recipient sources, groups and domains).
The kinds of filter
Section titled “The kinds of filter”The dialog always offers the first four filters below; the other two depend on your site and your recipient source.
| Filter | Leaves out |
|---|---|
| By newsletter | Everyone who received the newsletters you select. Recurring newsletters are listed when you select Show recurrent newsletters |
| By view | Everyone in a view of a SharePoint list: you choose the View and the list’s Email column |
| By email or domain | The addresses that match the patterns you type, separated by commas (see below) |
| Duplicates | Second and later copies of the same address, with Remove duplicates. They are counted under Removed duplicates, not Excluded by filters |
| Subscription topics | Everyone who isn’t subscribed to the topics you select under Send emails only to recipients subscribed to. Offered when your site uses SharePoint subscribers |
| Conditions | Everyone whose properties don’t meet your conditions. Offered when the recipients come from groups, such as Microsoft 365, AD groups or Exchange groups |
Addresses and domains
Section titled “Addresses and domains”Under By email or domain, each pattern is one of these:
- an address:
alex.morgan@partner.example; - an address with
*standing for any text:*@partner.exampleleaves out everyone at that domain; - a regular expression between
^and$, for example^[a-z.]+@partner\.example$.
Send to some people in a group only
Section titled “Send to some people in a group only”Conditions compare each recipient’s properties, such as their office or department, with values you choose. A
newsletter for the London office, for example, can go to the All Employees group with the condition Office is
equal to London.
In the Recipients step, choose the group, then select Add under Filters.
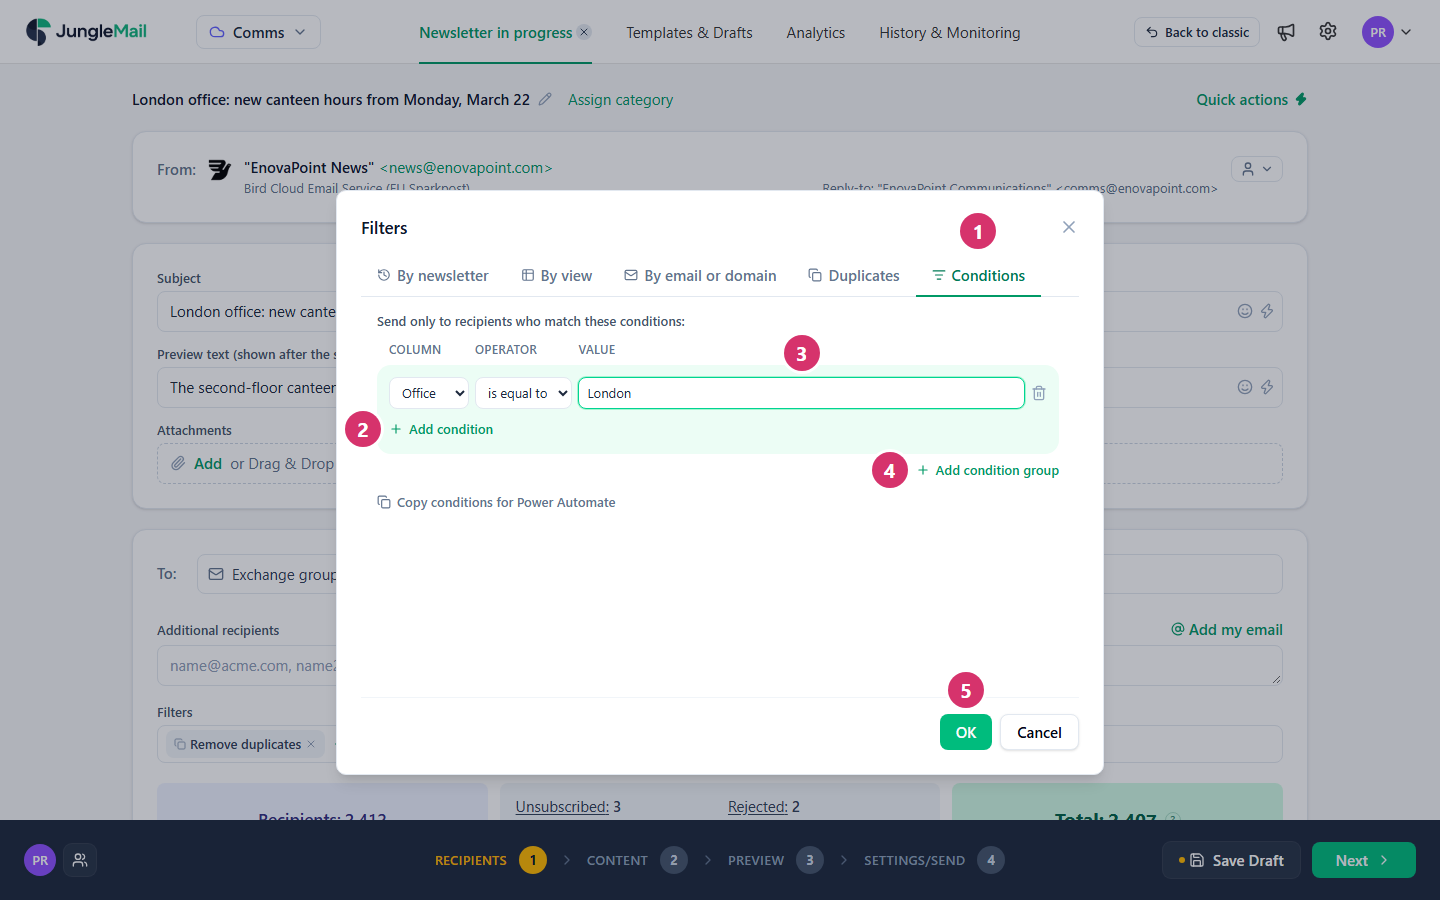
- In the Filters dialog, select Conditions.
- Select Add condition.
- Choose the Column, the property to compare, and the Operator, then type the Value.
- To add another condition, select Add condition again and choose whether both must be true (And) or either
(Or). Add condition group groups conditions, like brackets. Join is not equal to conditions with
And: Office is not equal to
LondonOr Office is not equal toDubaiis true for everyone, so it leaves nobody out. - Select OK.
| Operator | Use it for |
|---|---|
| is equal to, is not equal to | One exact value |
| contains, begins with | Part of a text |
| is in range of | Any of several values, separated by commas or semicolons: London; Amsterdam |
| is greater than, is greater than or equal to, is less than, is less than or equal to | Numbers and dates |
| is approaching in, is past by | Dates a number of days ahead or ago, such as contract end dates |
| is Null, is not Null | Empty or filled-in properties |
Under Filters, the conditions are listed as Conditions (1): select it to change them, or select the × to remove them. Excluded by filters includes everyone the conditions leave out, and Total is everyone who will receive the newsletter:
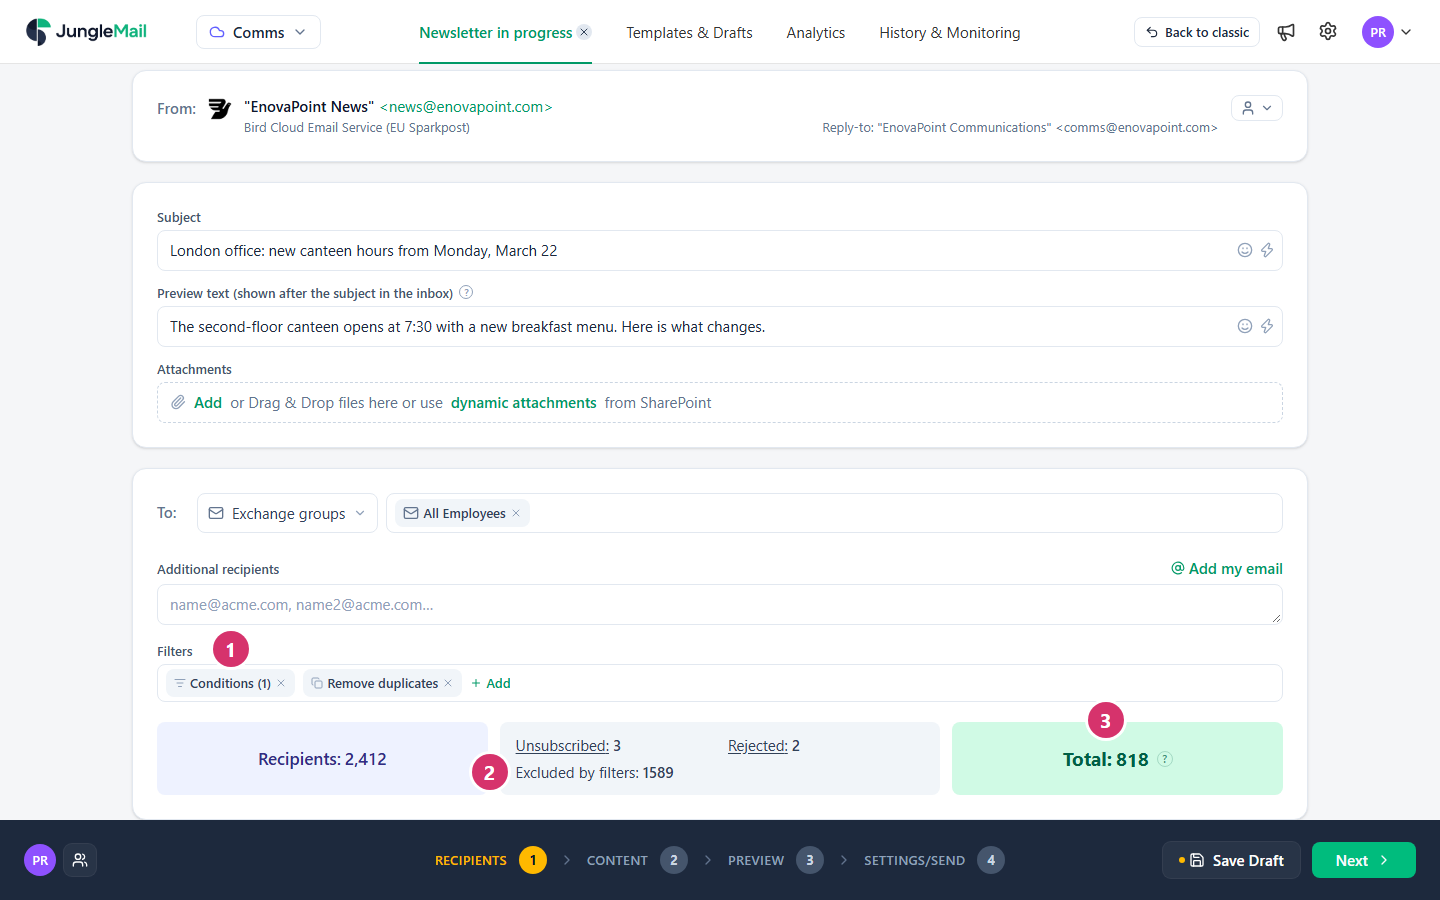
Check the result before you send: the Preview step lets you go through the recipients one by one (Preview and test a newsletter).
- Have people who ask to stop added to the unsubscribes. A filter works for one newsletter only; the site’s unsubscribes leave the address out of every newsletter the site sends (Manage unsubscribes and rejections).
- Check that your directory has the value. Someone whose office is empty in your directory doesn’t match Office
is equal to
London. To count them, try Office is Null for a moment and look at Total; your IT team can fill in what is missing (How to manage user profile information in the Microsoft Entra admin center). - To send to the people in a SharePoint view, choose the view in the source. The By view filter does the opposite: it leaves them out. Choose the list as the SharePoint list source and the view under its Filters instead (Send to a SharePoint list).