

Set up JungleMail for your organization
Before editors can send newsletters, someone sets JungleMail 365 up once: starts it for the organization, connects it to Microsoft 365, adds a sending account, and lets people in. This tutorial takes you through those steps in order; each links to the full instructions. Steps 2, 3 and 5, and the Send As permission in step 4, need a Microsoft 365 administrator, so plan them together.
Almost everything here is in the Settings menu, the cog at the top right: Site Management for one JungleMail site, Global Management for the whole organization.
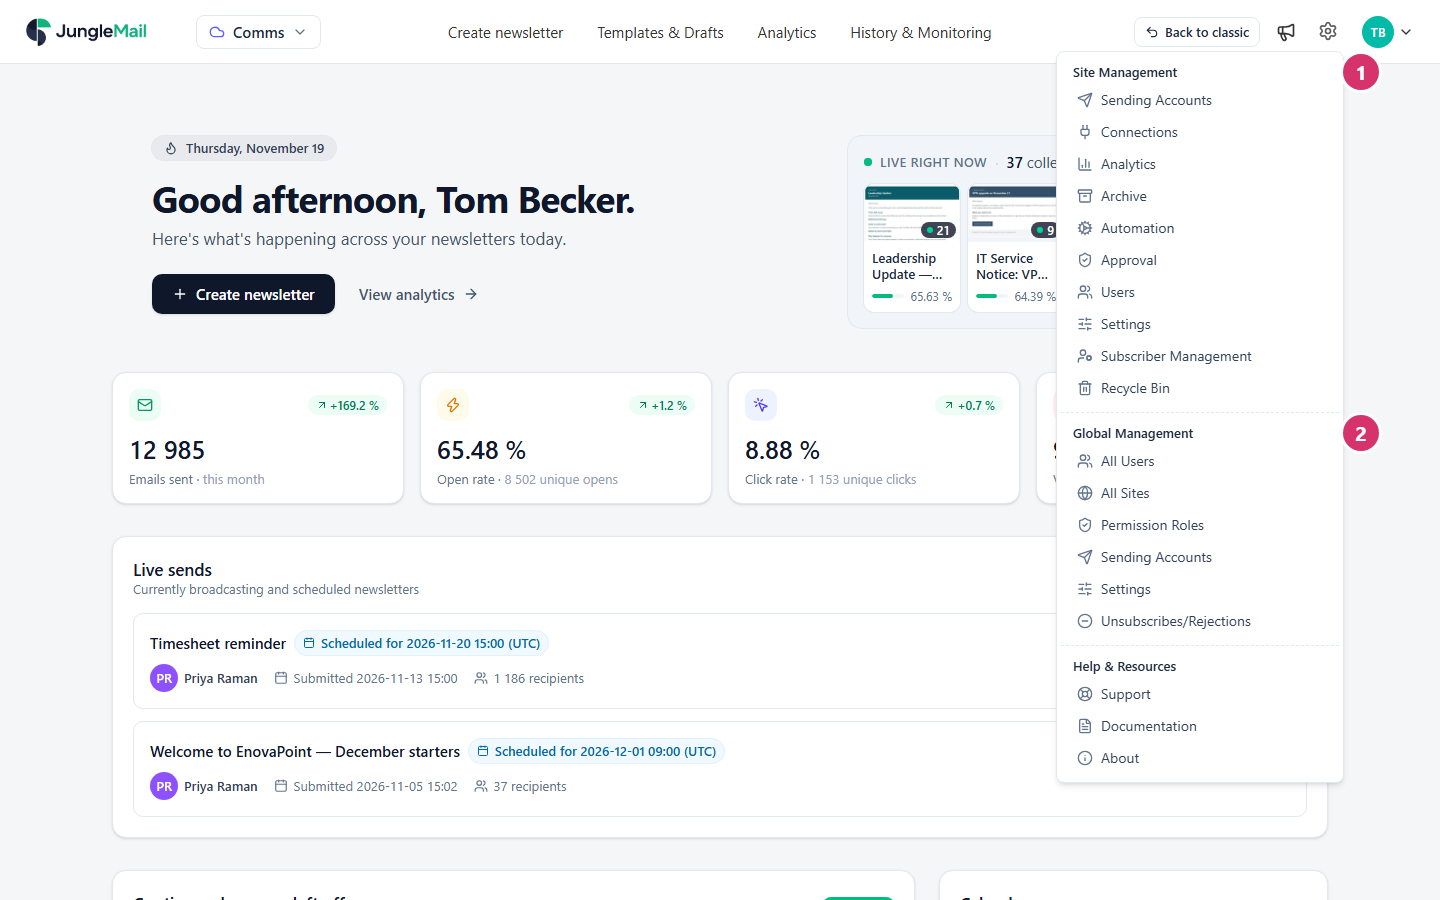
Step 1: Start JungleMail for your organization
Section titled “Step 1: Start JungleMail for your organization”- Choose where your organization’s data is hosted, sign in with your Microsoft 365 account, and start a trial (Sign in to JungleMail, Start a free trial).
The person who completes the trial form becomes the organization’s first global administrator (Global administrators), so it should be whoever will look after JungleMail. EnovaPoint then reviews the request: until the trial is approved, JungleMail shows Your trial request has been submitted. Once it is, select Refresh to start.
Step 2: Let JungleMail into Microsoft 365
Section titled “Step 2: Let JungleMail into Microsoft 365”- Ask a Microsoft 365 administrator to grant consent to JungleMail for the whole organization, so that nobody is asked for approval when they sign in (Grant consent to JungleMail).
Everything a Microsoft 365 administrator does for JungleMail is in Set up Microsoft 365 for JungleMail.
Step 3: Connect your groups and SharePoint
Section titled “Step 3: Connect your groups and SharePoint”In Settings > Connections, connect what your newsletters will use:
- Microsoft Entra ID, to send to Microsoft 365 groups and distribution lists (Connect Microsoft Entra ID). An Entra admin grants its consent once: if you aren’t one, send them the link from Copy consent link in its setup.
- SharePoint, to send to SharePoint lists and fill newsletters with SharePoint content (Connect SharePoint). Decide with your IT team whether it reads SharePoint with each person’s own permissions on the sites you grant, the choice for most organizations, or with a service account, the quicker to set up (SharePoint connection: service account or selected sites).
- Microsoft Exchange, if you send to dynamic distribution groups, such as EnovaPoint’s All Employees (Connect Microsoft Exchange). JungleMail reads the groups as the account that authorizes the connection, so use one that will stay. With Exchange Online, it works until April 1, 2027, when Microsoft retires Exchange Web Services.
Step 4: Add a sending account
Section titled “Step 4: Add a sending account”- Decide where newsletters are sent from: a Microsoft 365 mailbox of your organization, a JungleMail mail server or a
mail server of your own (Choose a sending account type). For
internal newsletters to up to 2,000 people, start with a Microsoft 365 sending account on a shared
mailbox, such as
news@enovapoint.com, authorized by an account that will stay. Newsletters arrive as internal mail, and the only setup outside JungleMail is that account’s Send As permission on the mailbox (Let users send as another mailbox). - In Settings > Sending Accounts, add it.
Step 5: Make sure newsletters arrive
Section titled “Step 5: Make sure newsletters arrive”With your Microsoft 365 administrator, check what your mail setup needs. The first three steps are needed only for newsletters sent through a JungleMail mail server, and the fourth for any sending account other than a Microsoft 365 one:
- Let JungleMail’s mail servers through your spam filter (Allowlist JungleMail’s mail servers).
- Send from your own domain (Send from your own domain).
- Keep newsletters from being marked as external (Remove the “External” tag from newsletters).
- Have Outlook show newsletter images without a click (Load newsletter images automatically in Outlook).
Then test with a few colleagues: check that a newsletter reaches their inbox, without the External tag and with its pictures, before you send one to everyone.
Step 6: Add sites and people
Section titled “Step 6: Add sites and people”- Create a JungleMail site for each team that sends newsletters, in Settings > All Sites (Create and manage JungleMail sites). Each site keeps its own templates, sending accounts, results and users.
- Add the people who will work on each site, in Settings > Users, with their roles (Manage site users). Give Editor to those who write and send newsletters, and Administrator only to those who look after the site’s settings. To let a whole team in, add its group with Add Users > Add groups.
Step 7: Make it yours
Section titled “Step 7: Make it yours”These are optional, and can wait:
- your brand’s colors and fonts (Fonts, colors and other branding settings);
- approval before newsletters are sent (Set up newsletter approval);
- results by department and office (Set up analytics segments and locations);
- an archive of sent newsletters in SharePoint (Archive newsletters to SharePoint).
- Make at least two people global administrators. Then someone can always add users, change settings and manage the subscription when the other is away (Global administrators).
- Make organization-wide choices in the global settings. Every site that inherits them, as new sites do, follows them at once, so you set branding, regional and privacy choices once rather than site by site (Global settings and inheritance).
- Tell your IT team which accounts JungleMail signs in as. Microsoft 365 sending accounts and the SharePoint connection sign in as an account. When its password is reset, the newsletters that use it pause until the same account signs in again (Monitor, pause and stop a newsletter).
What’s next
Section titled “What’s next”- Send your first newsletter, to check that everything works
- Manage a JungleMail site
- Manage your organization